Difference between revisions of "Advanced user guide"
| Line 224: | Line 224: | ||
==== Noteworthy products ==== | ==== Noteworthy products ==== | ||
| − | https:// | + | [[https://wiki.openfoodfacts.org/Noteworthy Products]] : sometimes products have rather ‘-non-standard’ information which makes it difficult to type the information. When that occurs simply go to this page and add the product to the list. |
==== Useful queries ==== | ==== Useful queries ==== | ||
[[Useful queries|https://wiki.openfoodfacts.org/Useful queries]] : a page where you could find many queries of the [[https://world.openfoodfacts.org/cgi/search.pl|search tool . It is a good place to find queries you may want to use as a template for your own ones. | [[Useful queries|https://wiki.openfoodfacts.org/Useful queries]] : a page where you could find many queries of the [[https://world.openfoodfacts.org/cgi/search.pl|search tool . It is a good place to find queries you may want to use as a template for your own ones. | ||
Revision as of 12:53, 20 September 2024
User Guide
A simple guide for Open Food Facts contributors
This document includes an overview of Open Food Facts user interfaces, rules, processes, step by step guides, useful links and other information related to the project.
General
Introduction
Open Food Facts is an open data initiative which aims to gather data on food products. All the data is published under an open data licence which allows anyone to re-use the data and build new apps, services and products on top of it. There are now more than 30 re-uses for things we could not have imagined, from health and fitness apps, special diet apps, to connected objects, scientific studies, and press investigations.
Two main sets of data that the project aims to gather are the nutrition facts - energy, amount of fat, proteins, etc. - and the ingredients, however other interesting data such as labels (bio, suitable for vegetarians, AOC, others) should be recorded. Having said that, the keen contributor- whether new to the project or experienced - may be sometimes confused on how to enter the data in the most correct way. This manual aims to be used as a reference that the contributor can come back to when needed.
Sister projects
Open Beauty Facts: Open Beauty Facts gathers data on cosmetic products from around the world.
- de SUCRES?: A game (in French) to challenge you to guess how much sugar is in food products.
- much SUGAR? In: A game (in English) to challenge yyou to guess how much sugar is in food products.
- Near Me: Made Near Me shows on a map where the food products you eat every day are made, transformed and/or packaged.
- emballé près de chez vous: Same as Made Near Me, in the French language.
Resources
Open Food Facts contributors overview
People who want to contribute to the Open Food Facts database can do so in many ways:
- Using the mobile apps to take pictures and enter basic information of products
- Using the openfoodfacts.org website in cases such as:
- Adding additional information that can’t be added using the mobile apps
- adding a product that doesn’t have a bar code
- adding a product by uploading pictures, including the picture of the barcode.
- using the mass upload tool to upload several products in one go.
Open Food Facts 101
When using the Open Food Facts mobile application (Android, iOS, Windows - insert links) the recommended way is to:
- scan the product’s barcode
- take pictures of:
- the front of the product
- the ingredients
- the nutrition facts
Once those three pictures are taken the most valuable information is already sent to Open Food Facts servers.
For those who want/can do more, take a picture of any other additional information available on the package such as:
- labels: Bio, suitable for vegetarian, fins friendly, free range, …
- Packaging code
- official website of the product/producer
- any other relevant data
press the save button.
Note: it is recommended to use the mobile application, as well as the website, being logged in, that way the contributor will be able to easily retrieved their products and edit them later on.
The ‘app’.
Open Food Facts has mobile applications for iOS, Android and Windows phones.
The website
Once a contributor has used the mobile application to enter the basic data, they may go to openfoodfacts.org to edit the product they added and complete all fields.
Basic rules
- Only the data available on the package should be added.
- 3 pictures are key: front, nutrition facts, ingredients. However other pictures which display information such as labels (Bio, Free Range, vegetarian…), EMB code, manufacturing location, etc. would be useful for tracking purposes. More pictures the better, don’t be shy adding pictures.
- Once pictures are added it is great to go to the openfoodfacts.org website to type the information, however it is not mandatory, any information is good information. If you do not have time to type the information you shouldn’t feel guilty, the pictures are already of great help.
Useful links
Step by step example
Here is an overview of the process to add a product to the Open Food Facts database. Most of the fields to fill in are pretty much self-explanatory, however go to section 7 for details and tips on each of the fields available on the web interface.
- Make sure you are logged in Using the app while logged in will allow you to easily track the products you added or edited on OpenFoodFacts.org website. Scan three, or more, pictures with your phone

|
- Look for ‘your’ product On xx.openfoodfacts.org, where xx is a country code such as uk, fr, cn, …, or ‘word’, click on the ‘Products you added that need to be completed’ link
- This will display the list of products you added when logged in. Go click on the product you want to complete. Note: the list of Products you added that need to be completed is displayed only if you are logged in to openfoodfacts.org.
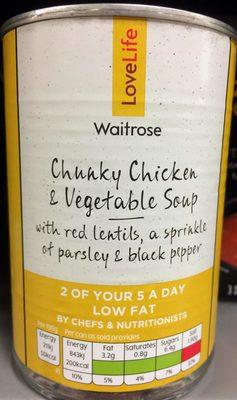
- Front picture
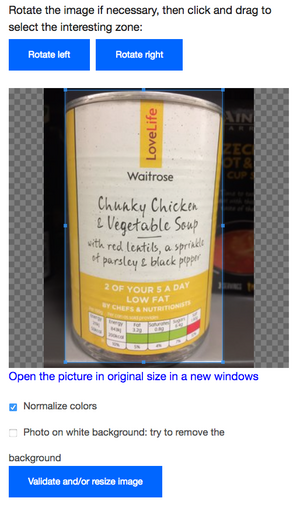
- Select the front picture then, using the mouse cursor, select the area of interest to remove the uninteresting background. For instance:
- After cropping the picture and clicked on ‘Validate and/or resize image’ button the new front picture will be: Checking the ‘Normalize colors’ button is usually efficient as it makes the image sharper in most cases.
- Fill the general information Fill the information as displayed on the packaging, try to fill as much information as available. For instance: The full name, as displayed on the packaging, was filled. In the ‘common name’ section try to put a name as used in the common language. It is fine to leave the field blank if no common name seems to be relevant to you. Do note that some fields are normalised, this is useful to ensure as much consistency across all products. For such fields, start typing words that seem relevant to you and select the most appropriate(s) entry(ies) for the product you are editing.
- Ingredients Select the image and crop it to show only the relevant information as you did for Step 4:. Type all the ingredients as displayed on the package, however use coma as a separator. On some products ‘;’, ‘-‘, or anything else are used as separator, instead use a coma ‘,’. When allergens are highlighted on the product, surround the ingredient with the underscore character as highlighted in the image above. This allows the app, Open Food facts one or third parties, to alert users who need such information. Tip:after saving the Ingredients image, if it doesn’t show above the input text box, but instead it is displayed on the right of the original image, then slightly resize your browser window (make it smaller) until the image is displayed above the input text box. This might make it easier to type the information depending on your screen size and resolution. From: To:
- Nutrition facts If available, type the nutrition facts as displayed on the packaging, otherwise check the ‘Nutrition facts are not specified on the product’ box.
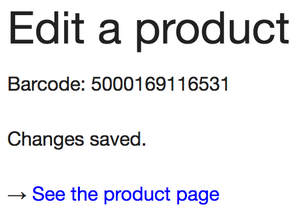
- Save and review Once it is all done, click on the save button. You’ll be redirected to a page confirming that the document was correctly saved. Click on ‘See the product page’ to review the information. If everything looks OK, you are done! Thanks for contributing.
Each field in details
Main language
If the mobile application you use is set with the same language as the product you enter than you should be fine. However, if the language is not the right one, you can change it using the drop down list.
Figure 1: Change the main language
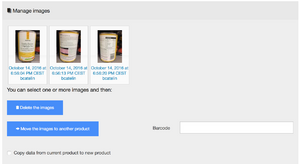
Manage images
Figure 2: Manage images
Here you can delete images as well as copy, or move, images from one product to another product in case pictures were mixed up or any other special case.
Product picture
Add Language
If the product already exists in one language and you are adding data in another language from the same product/barcode, click on the ‘add language’ button and edit the data with the right language tab chosen.
Front picture
Select the front picture then, using the mouse cursor, select the area of interest to remove the uninteresting background. For instance:
After cropping the picture and clicked on ‘Validate and/or resize image’ button the new front picture will be:
Checking the ‘Normalize colors’ button is usually efficient as it makes the image sharper in most cases.
Product characteristics
Product name
Enter the product name as displayed on the packaging.
Common name
Enter a name as used in day to day life. Leave blank if irrelevant.
Quantity
Enter the quantity with the unit. Here are some examples:
- 400g: simple case.
- 400g(235g): in some cases, you may see: total weight 400g, 235g when dried.
- 6: when there is no unit available, for instance with eggs.
- 180 capsules: dietary supplements often don’t display the weight but instead show the number of capsules in the box.
Packaging
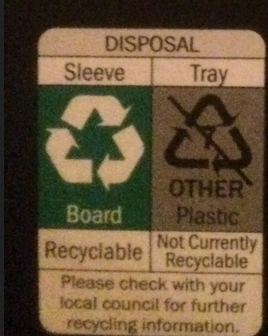
In the ideal case the information is displayed on the packaging, in that case you just need to type what is displayed. For instance, ‘Sleeve board’ and ‘plastic tray’.
When the information is not displayed try to put the most accurate information possible
Brands
Type the brands as displayed on the packaging. Sometimes products seem to have multiple brands, in that case it is OK to type more than one brand.
Categories
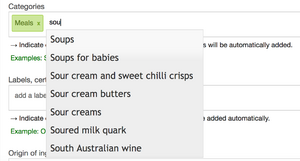
Categories are normalised, start typing a word and a list of suggestions will appear. Most categories should already be present so there is, in most cases, no need to enter a new category. It is better to try to stick to the existing categories where possible.
You may want to try different combination of word to find the right category. For instance, you may start typing ‘red w’ to list red wines, instead of typing ‘wine’. In case of doubt you can ask on [[1]] in the #general channel.
Labels, certifications, awards
This field is also normalised, same as for Categories you should start typing the category name, as displayed on the packaging, and the system should auto-complete the name for you.
Origin of ingredients
As usual, enter the information as displayed on the label. For instance, if you see ‘made in Austria’, type ‘Austria’. Leave blank if there is no information displayed.
Manufacturing or processing places
same as for Origin of ingredients.
EMB code
In Europe, code in an ellipse with the 2 country initials followed by a number and CE.
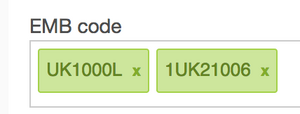
For eggs you may see two packaging codes which are not EMB codes, please enter them. Here is an example of such information:
Figure 3: 1UK21006 & 1UK1000L
The image is blurry due t the poor quality of the camera’s author, however the information was entered that way:
Link to the product page on the official site of the producer
Best before date
This field is not yet normalised; however, the recommended format is: <DDMMMYYYY>.
Example: 02NOV2016
City, state and country where purchased
Country, city, state, borough, or any other relevant geographical data where you bought or scanned the product.
Stores
Countries where sold
Enter the country where you bought or scanned the product. Do not guess where it is available. Because of product has ingredients in German, French and Dutch does not mean that it is sold in The Netherlands. It could be a product sold only in Luxembourg. As for all other fields, only input the data you know is 100% right.
Ingredients
Select the image and crop it to show only the relevant information as you did for Step 3:.
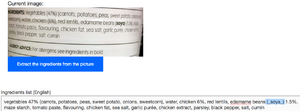
Type all the ingredients as displayed on the package, however use coma as a separator. On some products ‘;’, ‘-‘, or anything else are used as separator, instead use a coma ‘,’.
Important: When allergens are highlighted on the product, surround the ingredient with the underscore character as highlighted in the image above. This allows apps, Open Food facts one or third parties, to alert users who need such information.
Tip:after saving the Ingredients image, if it doesn’t show above the input text box, but instead it is displayed on the right of the original image, then slightly resize your browser window (make it smaller) until the image is displayed above the input text box. This might make it easier to type the information depending on your screen size and resolution.
Nutrition facts
If available, type the nutrition facts as displayed on the packaging, otherwise check the ‘Nutrition facts are not specified on the product’ box.
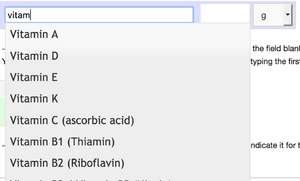
If a nutrient is not pre-listed just start typing it and Open Food Fact system will autocomplete it for you as most nutrients are normalised (note: not fully available for all for all languages).
Miscellaneous
Useful links
Products you added a picture to
https://world.openfoodfacts.org/photographer/USERNAME
https://world.openfoodfacts.org/photographer/bcatelin/entry-dates
Products you edited
https://world.openfoodfacts.org/editor/bcatelin
Informer
https://world.openfoodfacts.org/informer/bcatelin/
Note: not sure what’s the difference with editor
Noteworthy products
[Products] : sometimes products have rather ‘-non-standard’ information which makes it difficult to type the information. When that occurs simply go to this page and add the product to the list.
Useful queries
https://wiki.openfoodfacts.org/Useful queries : a page where you could find many queries of the [[https://world.openfoodfacts.org/cgi/search.pl%7Csearch tool . It is a good place to find queries you may want to use as a template for your own ones.

